Showing posts with label twd. Show all posts

Tuesday, August 11, 2015

TWD | Baking Chez Moi | Cherry Crumb Tart

Tuesdays with Dorie baking through Baking Chez Moi
by Dorie Greenspan


This tart was an all day affair to put together - but with a little advanced planning it can be made over a few days if need be.


There are several ways to pit a cherry if you don't have a cherry pitter - from using a knife to using a paperclip - just do a Google search. Here, I used a decorating tip. Worked great - took me about twelve minutes to pit a pound of cherries. Next time I would pit them inside of a bowl to capture the juices.


Pitting cherries can be quite messy - this method seemed to have minimal squirting when done slowly.

If you want a less messy and faster way to pit cherries, you can lay the cherries out on a rimmed cookie sheet or on a board, and place a piece of parchment over them, and tap them lightly with a mallet, as shown in this video. Your cherries won't stay whole (many of mine did not anyway) as Dorie prefers, but for this dessert, I really don't think it would matter all that much.


After partially baking the crust, and letting it cool to room temperature, it is filled with an almond or hazelnut filling made from butter, sugar, nut flour (I just ground up some hazelnuts), cornstarch, egg, and kirsch (or vanilla extract) - I subbed cassis. The pitted cherries are placed atop the filling and baked until the filling puckers up all around the fruit.


If cherries are unavailable, I'm sure any fruit, from blueberries to peaches would work here. 


A streusel topping made from sugar, orange zest, flour, salt, cardamon, butter, and vanilla extract, is sprinkled over the top and baked once more until lightly golden.


Dorie recommends serving this at room temperature the same day it is made. Her husband however, prefers it cold from the fridge, and I agree with him. I thought it was really good cold - so this would make a good candidate for a make ahead dessert.


We have been asked not to post the recipes here on our blogs. You can find the recipe on page 148 of Baking Chez Moi, or over at Google Books.

You can check out my fellow baker's results, by clicking here for a list of their links.

Friday, June 12, 2015

TWD | Baking Chez Moi | Chocolate-Cherry Brownies

Tuesdays with Dorie baking through Baking Chez Moi
by Dorie Greenspan


Hello, deliciousness...


This is a pretty basic brownie recipe, aside from the addition of a little black pepper, extra chopped chocolate to stir in at the end, and dried cherries that have been reconstituted in simmering water and port (or another sweet wine), which I did not have either of, so I used a dark crème de cassis.

There was a lot of chatter about the recipe taking far longer to cook than the twenty-seven to twenty-nine minutes in a 325°F oven as instructed - so I set my oven at 350°F and they were done in twenty-five minutes, and were perfect.

These brownies turned out deliciously gooey, full of chocolate flavor, with a slight tartness from the cherries. They also were pretty sweet. I'm thinking next time I'll cut back on some of the sugar.

These were really, really good. I made sure hubby took them to work the next day so I wouldn't pig out on them - which I definitely would have.

Well, I went into work two days later, and there were still some left over?!! How can that be? So of course I had to try another one (or two, maybe three... um yeah..) to see how they fared two days later. They were not as gooey, a bit more dense, fudge like - so very good still! I don't think the guys cared for the cherries... oh well, their loss, my gain - literally, unfortunately.


We have been asked not to post the recipes here on our blogs. You can find the recipe on page 322 of Baking Chez Moi.

You can check out my fellow baker's results, by clicking here for a list of their links.


Tuesday, April 28, 2015

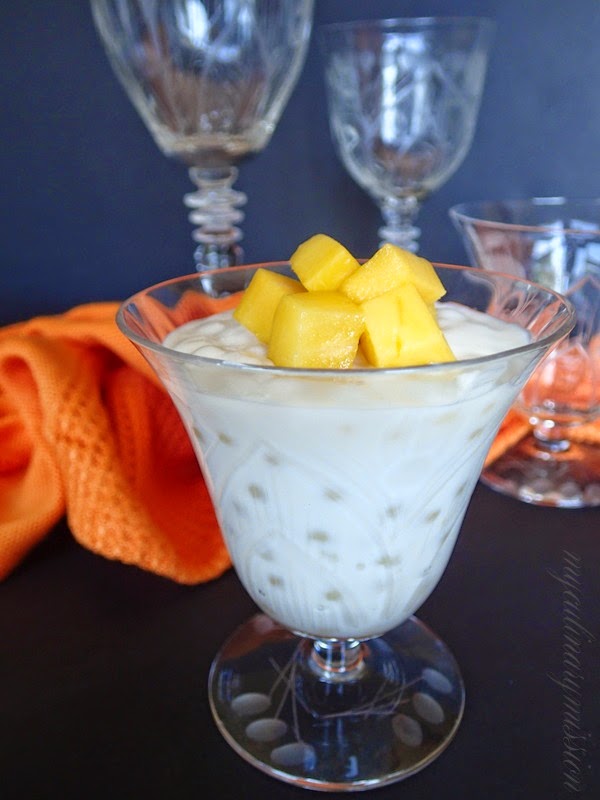
TWD | Baking Chez Moi | Coconut Tapioca

Tuesdays with Dorie baking through Baking Chez Moi
by Dorie Greenspan


I knew tapioca as a type of pudding, which I have never had before this, but beyond that I knew nothing about it.

Just what is tapioca exactly? Well, it's a starchy tuberous root of all things, also known as cassava. It is one of the purest forms of starch food. Tapioca is also used as a thickening agent. Many refugees in Southeast Asia actually survived on tapioca during World War ll.

Did you know you can actually make your own tapioca pearls if you can not find them? A quick internet search will show you how.


Like I said, I never had tapioca pudding before. I was expecting it to be pudding like - smooth and creamy (aside from the little balls of tapioca). Which it was, until I refrigerated it. Then it turned gelatinous, Jell-O like, but firmer. So firm, that you would be able to cut it with a knife, and serve little squares of it - which could be fun. Maybe.

My sister was coming to dinner the following evening, and I asked it she ever had tapioca. Yes, she had, and she loves it! Couldn't wait to try mine. The consensus was, it had good flavor, but it is supposed to be soft and creamy, not firm.

Hmm. Maybe I overcooked it? I cooked it until it was the texture of (non-Greek) yogurt, as instructed. I have some tapioca pearls leftover, I'll give it another try, cooking it for a shorter time.


We have been asked not to post the recipes here on our blogs. You can find the recipe on page 382 of Baking Chez Moi, as well as on Google Books.

Do check out my fellow bakers results, by clicking here for a list of their links.


Tuesday, April 14, 2015

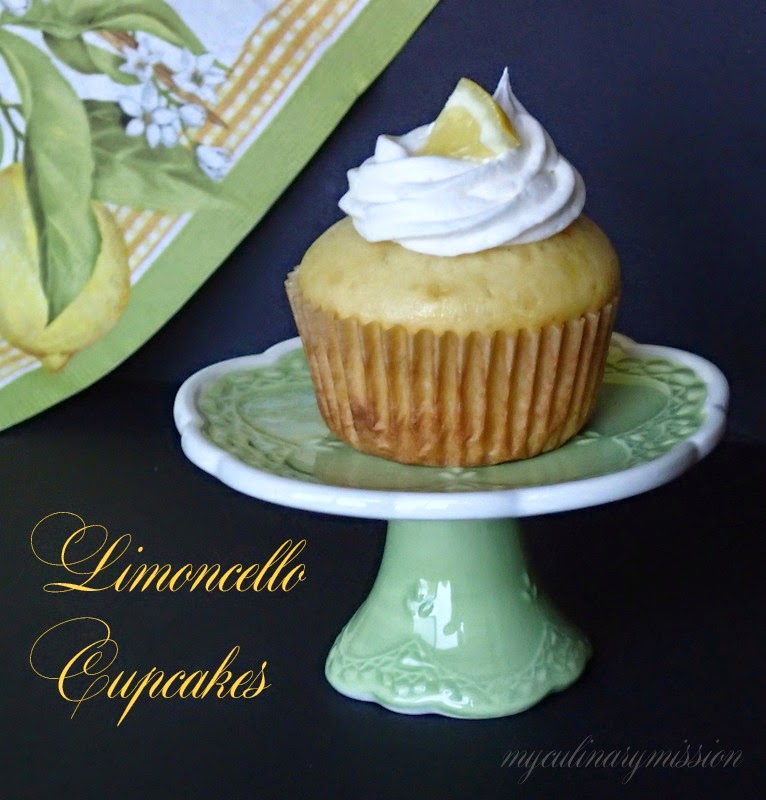
TWD | Baking Chez Moi | Limoncello Cupcakes

Tuesdays with Dorie baking through Baking Chez Moi
by Dorie Greenspan


I was so excited to see the recipe I nominated was chosen. Love, love, love, all things lemon!


The cupcake batter consists of flour, baking powder, cardamom (love cardamom! though I did not detect it at all in the finished product), salt, sugar, lemon zest, yogurt, eggs, limoncello and oil. A small amount of batter is placed in the cupcake liner, then topped with a teaspoon of (optional) lemon marmalade, then covered with the additional batter.

All I could find was orange, lime, or a blended marmalade. I was going to use lemon curd in place of the marmalade, but I could not stop thinking of the marmalade blend, that was made up of orange, lemon, and grapefruit, so I went with that.

The baked cupcake is then brushed with a limoncello/simple syrup mixture while the cakes are still warm; I poked a few holes in the top of each cupcake to allow the syrup to really seep into the cakes.

The frosting is made up of butter, powdered sugar, limoncello, and lemon juice.


These really need a prettier cupcake liner. I have whole box of pretty wrappers that my daughter gifted to me; but I was rushed, and didn't even think about it, until I pulled them out of the oven. Grrr.

I so wished I went with the lemon curd filling... the marmalade was too bitter for my liking. I was also surprised, between the lemon zest, lemon juice, and limoncello, that these did not have a stronger lemon flavor.

This seems to be an issue with my quest for the perfect lemon cupcake. I want a lemon cupcake that makes you pucker up, literally; I want that intense lemon flavor, you know, the one that sends you to the moon and back.

Still searching for the ultimate lemon cupcake...

If you have such a recipe in your repertoire, please leave a link in the comments below! I would be forever grateful! :)


We have been asked not to post the recipes here on our blogs. You can find the recipe on page 194 of Baking Chez Moi.

Do check out my fellow bakers results, by clicking here for a list of their links.


Tuesday, March 24, 2015

TWD | Baking Chez Moi | Crispy-Topped Brown Sugar Bars

Tuesdays with Dorie baking through Baking Chez Moi
by Dorie Greenspan


The delicious caramelized Rice Krispies topping.

Ha! This piece looks like a fish!

Before you begin baking the bars, you make a crispy topping made from (my childhood cereal), Rice Krispies; not much to it really. You just melt a bit of butter and oil, add the cereal and stir until all the grains are evenly coated as possible, and stirred some more until the cereal turns a nice golden brown.


The base of these tasty treats are basically a shortbread cookie crust with the addition of brown sugar. Dorie states to show the dough "who's the boss" to get it spread evenly over the pan. This tells me there may be a bit of a struggle ahead. I found wetting my hands helped to spread the dough into the pan, with little sticking to the fingers. I'm sure using a piece of buttered parchment would work just as well.

Once the base is baked to a lovely golden brown (the instructions say to bake the crust for about twenty-two minutes; mine was ready at thirteen minutes), the top is scattered with chopped chocolate and returned to the oven for a minute or so, just until the chocolate has melted.


The melted chocolate is spread evenly over the shortbread base.


Then topped with the caramelized Rice Krispies.


I originally cut the bars as suggested in the book, about a two-inch square. However, when I tasted these little gems, I found them to be overly sweet.


So I cut the squares in half, which I thought were the perfect size, especially if they are served as party fair.

I sent the lot (minus one) with my husband for him to share with the boys. Of course, I had to have at least one with my morning coffee, and I found that the sweetness dissipated somewhat after sitting overnight. Good thing I sent these away! I probably would have eaten them all! 

The following morning, I received a text from the Mr., everybody liked them. :)


Tuesdays with Dorie is an online baking group. We are making our way through Baking with Julia and Baking Chez Moi, both by Dorie Greenspan. 

We have been asked not to post the recipes. You can find this recipe on page 324 of Baking Chez Moi.

You can check out my fellow bakers results by clicking here for a list of their links.


Wednesday, January 7, 2015

TWD: Inside-Out Upside-Down Tirami Sù

TWD baking through Baking with Julia
by Dorie Greenspan
Contributing baker: Gale Gand


Tiramisù has been on my to-make list for the longest time, and when I saw it on the nomination list, I seconded that option - without reviewing the recipe beforehand.

Little did I know it was going to be nothing like the Italian dessert of coffee soaked lady fingers, layered with a mascarone cream filling, and topped with a dusting of cocoa, that I was so excited to finally be making, and marking off my list.

This version is made with phyllo dough, coffee flavored granita, and a cinnamon flavored saboyan sauce.


The recipe calls for four-inch ring molds which I do not have, so I formed my own with aluminum foil.  The phyllo dough is buttered and sugared (a mix of sugar and ginger), then scrunched up and placed into the mold. I forgot to add the sugar before scrunching, so I sprinkled it on top after the fact (before baking).

My sugar looks a bit clumpy because I used fresh ginger rather than dried, and the moisture from the ginger made it clump, which after baking gave it a wonderful hard, crunchy texture.


One of the benefits of baking and posting late, is you get a chance to read your fellow bakers posts to see if they experienced any issues with the making of the recipe. The consensus was that the granita melted almost immediately after being plated. So I made sure I had everything ready to go. I even sprinkled the top phyllo pillow with powdered sugar and shaved chocolate before assembly.

For a little extra pizazz, I added a drizzle of caramel sauce that I had hanging out in the fridge.

Gayle's sabayon sauce recipe calls for whipped cream and mascarpone to be stirred into cooled custard; I did not have any whipped cream, so I added enough half-and-half to thin the sauce to an almost pourable consistency.


I wasn't expecting to like this much after my disappointment in finding this was not a classic tiramisù; and the whole time, with each step, I kept saying to myself, I really don't feel like making this... I was so not in the mood.

In the end, I thought it was really good! The only thing I would do differently next time, is make the espresso stronger. I used instant espresso coffee, next time, either add extra, or just hit up Peet's for a real espresso.

You can find the recipe on page 398 of Baking with Julia, or by clicking here.

To see what my fellow bakers thought of this recipe, click here.


Tuesday, December 16, 2014

TWD: Chocolate-Mint Nightcaps

Tuesdays with Dorie baking through Baking with Julia
by Dorie Greenspan
Contributing Baker: Marcel DeSaulniers


Ahh, I was so looking forward to making these!! Chocolate mint ganache, sandwiched between two chocolate cookies, and topped with even more ganache (to resemble a nightcap).

These treats are small, and are meant to be eaten with your fingers. However, a fork may have been better, for the cookies are like a small moist sponge cake, that stick to the tips of your fingers, and are quite messy.

These were a bust for me. The chocolate mint ganache had no mint flavor to it all. I should have went with my instinct to infuse the cream for a longer time - at least an hour, as I do when I make ice cream. It also was too firm to pipe. Well, it was perfect when I pulled it from the fridge, but as it sat out on the counter, while I baked my last set of cookies, it firmed up even more! I had to place the bowl of ganache over a waterbath to soften it back up. Unfortunately, the ganache was not as smooth after doing so.

I felt the cookies were too light for the heavy ganache. I'm thinking maybe brownies would work better, or maybe even meringue cookies for more of a textural difference.

I only made a few for the photo - the rest of the cookies are in the freezer, waiting for a recipe that calls for cake crumbs - they'll probably end up in the trash though. And the extra ganache? Who knows. Would hate to throw out all that good chocolate. Maybe I can make truffles with it, or stir it in to warm milk for hot cocoa. (It would be a lot of cocoa!)

To view how my fellow bakers fared with this recipe, click here to be taken to the TWD blogroll for their links.


Tuesday, November 18, 2014

TWD | Baking with Julia | Amaretti

Tuesdays with Dorie baking through Baking with Julia
by Dorie Greenspan
Contributing Baker: Nick Malgieri


The book states that amaretti means "little bitter things", due to the use of sweet and bitter almonds in the dough; and that bitter almonds cannot be imported into the United States*. 

These not so little cookies of mine, are made from only a few ingredients; four to be exact, and one of them being optional: almond paste, sugar, egg whites, and pine nuts (I used sliced almonds).

The almond paste is mixed with the sugar in two increments until the paste turns into very fine crumbs; next, the egg whites are mixed in. Bam! Done. How easy is that?!! So easy, it felt as though something was missing.

The dough is transferred to a pastry bag and small mounds are placed on a baking sheet that has been lined with parchment, about one and a half inches apart. I obviously made mine too large, for I only yielded a baker's dozen, as where the recipe states it makes about three dozen! Oops.

Before baking, the cookies are dabbed with a wet towel to remove the points and ridges made from the pipping tip; this also helps produce the crinkly top. If using the optional nuts, they are applied at this time. I topped a third of my cookies with almonds, another third with powdered sugar, and left the last plain.


They are baked in a 325° oven for about twenty minutes.

The cookies did stick to the parchment, as noted in the book that this could happen. I have a very thin metal spatula that I used to remove them - it worked OK. It is recommended to wet the underside of the parchment, using a pastry brush with hot water, and allowed to sit for a few seconds, until the cookies can be released. I started with this method, but when I lifted the parchment paper, the powdered sugar started falling off my cookies.

The cookies were wonderful the day they were made, but I liked them even more a day or two later. They became a little more crisp on the outside, with a wonderfully chewy center. They do become rather dry and too crispy, after day two. 


Though I enjoyed them all, the powdered sugar ones were my favorite.

These were so easy, so sweet, and so dangerously good (not knowing just how dangerous they could be!)
 
*Of course I had to find out why bitter almonds were not allowed to be imported into the US as mentioned in the book. Did you know, that bitter almonds contain a naturally occurring toxic chemical, hydrogen cyanide? This chemical has serious side effects such as slowing of the nervous system, breathing problems, and death. According to WebMD, they advise not using bitter almond. Ah yeah...

In my research, I ran across this current recall from Whole Foods for said almonds, imported from Italy and Spain??? Hmmm - maybe import restrictions have eased since 1996 - when this book was printed.

Do head over to the TWD website by clicking here to see the results of my fellow bakers.

Tuesday, November 11, 2014

TWD | Baking Chez Moi | Palets de Dames, Lille Style

Tuesdays with Dorie baking through Baking Chez Moi
by Dorie Greenspan


Our Tuesdays with Dorie group is starting with a new book which was just released at the end of October - Baking Chez Moi - Recipes from My Paris Home to Your Home Anywhere, by Dorie Greenspan; and this is the first recipe from the book, Palets de Dames, Lille Style (Lille - a city in France).


We still have just under two years left with Baking with Julia, and will be posting on opposite weeks. That means a TWD recipe every week, instead of every other week. Oh my... anyone in need of a few baked goods?


These cute little cookies have a fancy name, but basically they are a cakey sugar cookie with a simple confectioner's sugar glaze.


I decided to make these pretty much at the last minute, and they came together rather quickly, aside from the dough needing an hour or so rest in the refrigerator to firm up a bit - just long enough for me to run to the store to grab something for dinner.


This simple dough is made from butter, sugar, salt, eggs, vanilla extract, and all purpose flour. As with most cookie doughs, you first beat the butter until creamy, then add the sugar and salt and beat until combined. The eggs are added one at a time and mixed until incorporated. The vanilla extract is added next, then the flour is added in three increments, until combined.

The dough is then chilled for at least one hour or until firm enough to shape.

Once the dough has chilled, balls of dough (about two teaspoons each) are placed on cookie sheet about two-inches apart, to allow for spreading (mine did not spread hardly at all). They are baked for about eight minutes, or when you see a slight brownness around the edge of the cookies.

The recipe states to transfer the cookies to a rack and allow to cool to room temperature. I always leave them on the baking sheet to cool, ever since I read somewhere.. that bakeries do not transfer their cookies to racks.


Once the cookies have cooled, they are ready to be iced. This icing consists of powdered sugar, milk, and lemon juice. The recipe states that if it needs to be thinner, add more milk - a drop at a time. I added more lemon juice to thin it, and next time, I'm thinking I'll use mostly, or all juice and omit the milk, for a more lemony flavor.

Some of my fellow bakers who happen to be in another on-line cooking group - French Fridays with Dorie, have already made this recipe; and reading their posts on this, it was mentioned the bottoms of the cookies were frosted, to give the look of a top (child's toy) or parasol; though the recipe given to us (before the book was released), states to dip one side into the icing - so I just assumed it was the domed side.

After dipping the cookies into the icing, I added a bit of lemon zest to the top for a little pizazz - which was very last minute. Next time, I would zest the lemon ahead of time and spread it out to allow it to dry a bit to make it easier to sprinkle atop the cookies - I had issues with it wanting to clump, with it being so moist.

I made only half the recipe - I wish I had made the full recipe - though grateful I did not.


We have been asked not to post the recipes from this book on our blogs. However, the recipe is available on Amazon - you can find it by clicking here and scrolling down the page. 

Do venture over to the TWD site for the links of my fellow bakers to read their thoughts on this recipe.

Tuesday, November 4, 2014

TWD: Alsatian Onion Tart

Tuesdays with Dorie baking through Baking with Julia
by Dorie Greenspan
Contributing Baker: Michel Richard


Well, this has the appearance more like a pizza than a tart - at least in my mind. When I think of a tart, I conjure up images of dough that has been pressed into a tart pan, and after baking, it comes out with beautiful ruffled edges.

OK. So looks aren't everything.


Taste. This does have taste going for it. It was quite delicious. 

This was very easy to make. You start with preparing the base (I did this while my onions were cooking) by rolling out puff pastry dough (yes - puff pastry - no tart or pizza dough here) until it is very thin, about an eighth of an inch, but no more than a quarter of an inch, and using a sharp knife, cut the pastry into a circle (I'm sure any shape you choose would work), about twelve inches in diameter.

The dough is pricked all over with a fork, this will keep the puff pastry from, well, puffing... it's all about the flavor. The dough is then refrigerated until you are ready to top it with the onion mixture.

The onion mixture is made from four very large onions that have been diced. I only used three, and was in a hurry, so I sliced the onions instead of dicing, and had more than enough. The onions are cooked in chicken broth until very soft, and then cooled, at which time you add a few tablespoons of heavy cream (I used half and half) and salt and pepper.

The recipe calls for slab bacon to be diced and par-boiled. The store I went to does not have slab bacon, so I purchased thick-cut bacon slices - which worked just fine. I skipped the par-boiling of the bacon, and cooked it up normally (undercooked it a bit), then diced it. 

The tart was now ready for assembly! The pastry is first topped with the onion mixture, then the bacon is scattered over the top and pressed into the onions a bit, to help keep them from burning too much while baking. I had some diced jalapeño left over from the chili I made the night before, so I tossed those on as well - a good call if I do say so myself - it provided a nice spicy kick that I love. The tart is baked in a three-hundred and fifty degree oven until golden brown.


This was delicious, and would make for a lovely appetizer; though it can't really be made ahead of time for the bottom crust gets a bit soggy after sitting. It is easy enough to throw together at the last minute if you make the onions, cook the bacon, and prep the dough ahead of time - then assemble and toss it in the oven just before serving.

I was thinking a rectangular shaped tart would be pretty...

Don't forget to check out the results of my fellow bakers also! You will find their links by clicking here, or by going to the Tuesdays with Dorie website and looking for the BWJ LYL: Alsatian Onion Tart link. 

Tuesday, October 21, 2014

TWD: Puff Pastry Pizzettes

Tuesdays with Dorie baking through Baking with Julia
by Dorie Greenspan
Contributing Baker: Michel Richard


Have you ever had bits of puff pastry dough left over from a recipe and did not know what to do with the scraps? So you either tossed it (gasp!), or thrown it in the freezer, where it ends up banished to the back not to be found for months, or maybe even years later? Well, we have a solution for you.

October was "puff month" for us TWD bakers - and this week's recipe uses those scraps that we had left over from the sunny-side-up pastries we made two weeks ago.

These are so uber easy to make, you may not want to wait till you have scraps. You may just want to go out and get yourself a fresh box right away!


There's really no "recipe" to make these. You just take your leftover scraps, roll out the dough to about 1/4 inch and cut out circles to the size of your liking. Add your favorite topping and bake in a 350° oven for about fifteen minutes, until puffed and golden. You do want to make sure to press the toppings into the dough a bit, so they do not slide off when the dough puffs up. 

I topped a few with tomato and blue cheese, some with sautéed mushrooms, and the others with tomato, and just a sprinkling of salt and pepper.


Out of the three, the tomato with just a dash of salt and pepper was my favorite. I took some to my sister, and she enjoyed the other two flavors (I ate all of the tomato with s&p).

You can also go with a sweet version if you like - like a sprinkling of cinnamon sugar, jam, or berries, the options are limited only to your imagination.

As usual, do check out what my fellow bakers have come up with. You will find their links on the TWD website, under the LYL: Puff Pastry Pizzettes link.


Tuesday, October 7, 2014

TWD: Sunny-Side-Up Apricot Pastries & Classic French Bread

Tuesdays with Dorie baking through Baking with Julia
by Dorie Greenspan
Contributing Baker: Michel Richard (pastries) / Danielle Forestier (bread)


Sunny-Side-Up Apricot Pastries


These cute pastries are a breeze to make when you take the short-cuts I did.

I had every intention of making my own puff pastry, but it has just been too warm to attempt - and I wanted to get these made pronto. I'm feeling so behind in my TWD participation. Hence the double post this week.

Not only did I use store-bought puff pastry (Dufour brand - the closest to homemade as one can get. It is made from only butter, flour, water, salt and lemon juice), I also used canned apricots, where the recipe calls for fresh, and to poach them. However apricots are no longer in season in California - just as well, for it saved me an extra step.


All that was left to make was the pastry cream. This pastry cream was OK. It had an odd after-taste after-feel, kind of powdery. I did add too much vanilla extract, but I don't think that would have given it it's odd texture; the good thing is, it wasn't noticeable after baking. Though next time, I'll use the recipe from Stars Desserts, by Emily Luchetti.

The dough is rolled out on a sugared work surface, then placed sugar side up on a baking sheet, the pastry cream and apricots are placed on top. They are baked for about thirty-five minutes in a three hundred and fifty degree oven until puffed and golden.

An apricot glaze, made from apricot jam and water that has simmered until syrupy, is brushed over the warm pastries. I think it is best to brush them after they have cooled, for the glaze seemed to just soak into the pastry, as well as the apricots. Brushing them again after they cooled gave them a shinier appearance.  


You may have noticed in the first picture, one pastry is smaller than the other. The first pastry I rolled out the dough according to the recipe, and thought it was awfully thin, and was afraid it would not have much of a rise, so I rolled the second one a little thicker and shorter; as you can see they both turned out fine. Though neither puffed as much as in the photo shown in the book. 

These were fun to make, and pretty tasty for how easy they were to prepare. I would like to make them again when apricots are in season - I think poached apricots might be a bit firmer, whereas the canned were quite soft.

I don't know what I like best - warm from the oven, or cold, straight from the fridge. I only made two of these and place one in the refrigerator overnight. The pastry still had some crunch to it, and there was a stronger apricot flavor when eaten cold. The pastry reheats nicely too. I placed half of the cold pastry in a three hundred degree oven for about five minutes.

Click here for the link to the recipe if you would like to make these yourself.


Classic French Bread


Well. The day I chose to make the French bread, the baking gods were busy, and not with me this day.


This recipe was scheduled for September. I did not get around to making it then, and we were having soup for dinner, and I thought it would be great to have some bread to go along with.

Reading the recipe, it sounded easy and doable in time for dinner. No matter that it was ninety-four degrees outside, and I would be preheating my oven to five hundred degrees.

I had my doubts from the very beginning. The dough just did not have the soft and supple feel to it as it looked in this video of Danielle making this very recipe. My dough was quite dry and firm. I added extra water, but that did not seem to help any.


After the dough has been formed into batard shapes (mishap number one: dropped one on the floor), it is placed on a floured linen or cotton towel, and the towel is pleated to help hold their shape. The picture above shows the dough after it has risen. Mishap number two: apparently I did not seal the seams tight enough - they started splitting. At least I knew my yeast was working.

These are then turned out onto a baker's peel, seam side down and slipped onto a baking stone or baking tiles (I used the back of a cookie sheet that was placed in the oven while it pre-heated). Then the oven walls are spritzed with water (alternatively you can pour water in a broiler pan that has been placed on the lowest rack) to create a moist environment. This is what gives the crust its characteristic crunch.


From the look of the slash marks, which I thought turned out so pretty - you can see the bread has an airy look to it. I couldn't wait to slice into it to reveal that airy, holey crumb that French bread has.

Did you know, that in France, it is a law that you have to wait twenty minutes after baking, before the bread can go on sale to the public? Also, no cornmeal is allowed on the baking peel or sheet either (some people use cornmeal for easy transfer and for extra crunch), for French bread is only made from flour, water, yeast and salt - nothing more.


No tunneling holes whatsoever. My crumb is tight as can be. Hmph. Looks like a flat standard white loaf, that also did not have any flavor to it. It did have a great crust though! Oh well. Maybe I'll try again when the weather is cooler.

If you would like to give this a try, click here for the recipe. Do visit my fellow baker's sites to see how they fared with this recipe and the pastry recipe. You will find their links on the LYL: Sunny-Side-Up Apricot Pasties link and the LYL: Classic French Bread link on the Tuesdays with Dorie website.