Tuesday, February 5, 2013

TWD: Focaccia

Tuesdays with Dorie baking through Baking with Julia
by Dorie Greenspan
Contributing Baker: Craig Kominiak


I have been sitting here for a couple of hours thinking what I want to say about this bread. Even with my notes in front of me I am at a loss for words; the dreadful writer's block monster has reared it's ugly head. (This may not be a bad thing!)

Our host for this recipe is Sharmini of Wandering Through. She will have the recipe on her blog should you be inclined to give this tasty bread a try yourself.

To read some very creative posts and to view beautiful pictures, head over to Tuesdays with Dorie site and check out the LYL: Focaccia link to check out the other bakers results on this weeks recipe.

Success meter (1-3): 3

Edit: In my bout with writer's block I failed to mention that the design element should be credited to my sister. She had brought something similar to our Oscar party a few years back.

You start with a few simple ingredients: Water, yeast, olive oil, all purpose flour and salt.

My toppings of choice: Marinated artichoke hearts, oregano, sage, thyme, jalapeños, tomatoes, and cheese.

 
 I finally get to use the salt I received at Christmas from my mother-in-law.

After an overnight rest in the fridge shape your dough and let rise once again.
The recipe in Baking with Julia calls to make three smaller focaccia loaves. I chose to make one large loaf and followed the directions for forming and cooking times from Fine Cooking magazine.

A space heater does wonders for heating up the kitchen on cool days to help speed up the rising process.

 
Final rise complete. Ready for the toppings!

 
I scored the dough after "dimpling" it. I left three squares herb only, topped another with sliced tomatoes, one with the marinated artichokes hearts and the last with jalapeño peppers. Then I sprinkled all with some ground white pepper and the Himalayan salt. A few minutes before removing from the oven I added shredded cheese over the jalapeños. 


The jalapeño and artichoke squares were my favorite.


The "plain" squares would benefit from more herbs.

 
Love the salt!

I used the extra toppings to make the best scrambled eggs ever!


Friday, February 1, 2013

Cranberry Pecan [fig, cherry, & apricot] Granola

Recipe from Food to Live By
by Myra Goodman


In a recent post I promised I would share with you my favorite granola recipe ~ and here it is!

I was first introduced to this deliciousness by a friend of mine, and had asked her to send me the recipe. I do not recall how long I had waited, but being the impatient person I am, I ran down to the bookstore and purchased the book myself; and a great purchase it was!

Homemade granola is superior to any store-bought and is so very easy to make. Once you do make your own, you won't want to buy it again.

I have made Ina Garten's granola recipe and I like the idea of adding additional dried fruit, but I felt it was lacking something. Don't get me wrong - it's good. I just had this recipe to compare it to and I really liked the dimension the orange zest lends to the granola; and I prefer the addition of the brown sugar over sweetened coconut.

This round I have added dried figs, apricots, and cherries in addition to the lone cranberries called for in the recipe - it's good both ways. That is one of the pleasures of making your own, you can customize it to fit your individual tastes.

Yes, I did eventually receive the recipe from my friend. I think I had made this a couple of times by the time she sent it to me - it's that good.

Success meter (1-3):


Stir to combine.


Add wet ingredients.

Place on rimmed cookie sheet and bake.


Cool completely before adding dried fruit.

Once cooled, add cranberries and/or other dried fruits of your choosing.

I like to keep mine in the pantry alongside some Dixie cups..

.. for a quick scoop and go!

Makes for a great snack while hiking!

Wednesday, January 30, 2013

Book Ninety-Three: On Rice

by Rick Rodgers


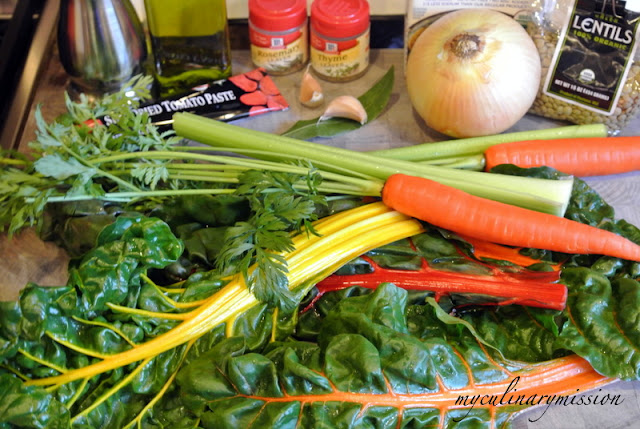
Lentil and Swiss Chard Stew


I have made a few recipes from this book, and one recipe in particular I have made multiple times - and I was going to make it again for this post!

I had a few extra minutes so I sat and browsed through this book again; as I was flipping through the pages this recipe caught my eye and I thought it sounded tasty, and it would be something new. Boy am I glad I went with this one. It's good - and good for you!

I went to my local market and the Swiss chard looked pitiful - so off I went to Whole Foods (aka whole paycheck - my grandmother always said, "you get what you pay for" - that is always in the back of my mind and oh so true in this instance.) Not only did the chard look absolutely wonderful, but they also had the rainbow chard, which I always think is so beautiful - so that's what I went with.

I had a hard time resisting the urge to add more broth at the end - this is supposed to be a stew, not a soup. Still, next time, I may add just a little more...

The stew had such wonderful flavor. I'm wondering if it was the freshly dried bay leaf I used; I'll have to make this again with a regular store-bought bay leaf to see if there is much of a difference.

Take my word for it - this is good.
 
Success meter (1-3):


Wednesday, January 23, 2013

WW: Hoisin Explosion Chicken

Wok Wednesdays wokking thru Stir-Frying to the Sky's Edge
by Grace Young


The one thing I like about the recipes in this book and stir-frying in general, is being able to get a meal on the table in no time. So when it is time to whip up a WW recipe I wait till the last minute before prepping.

Oops - not so with this one!

Don't get me wrong - this is still an easy recipe to throw together, it just has a couple of extra steps that I was not expecting. Yes, I did read the recipe - the other day. I just forgot the extra steps of chilling the prepped chicken (meat mixed with cornstarch, egg white, rice wine, salt and water) for thirty minutes and the need to "blanch" the chicken in boiling oiled-water beforehand; a technique called velveting.

Normally when a recipe calls for chicken breast, I sub chicken thighs for they are generally more moist. The last two dinners I made calling for breast meat, I used breast meat, and was sorry; the chicken turned out extremely dry. However, my positive experience with Grace's recipes made me stick with using breast meat once again.

The chicken turned out amazingly tender and silky smooth; well worth the extra step and time.

Hoisin sauce is described as salty, sweet and spicy. However, the brands that I have used have not come across all that spicy to me, so I was confused by the title Hoisin Explosion Chicken. Explosion to me translates to POW! a hit of spiciness so hot you run for a big glass of water hoping to squelch the heat.

While prepping my ingredients (mise en place), the recipe called for one-half teaspoon of red pepper flakes - this is where the POW! comes from.

Another successful recipe - you can't go wrong with this book.

Success meter: (1-3): 3


I made one small change and that is I used red bell pepper in place of green.


The blanched chicken.


Those are purple carrots - not burnt. :)
Wouldn't this be beautiful served on a black plate..


You will not find the recipe here on my blog or within the Wok Wednesdays community. We encourage our readers to purchase this book at their local independent bookstore or on-line to support the publishing industry and to help keep books alive! I know I prefer to flip through the pages of a book rather than read them electronically; nothing compares to the feel and smell of a printed book.


Make sure to visit my co-wokkers to see their results on this stir-fry.
Look for the LYL link on the Wok Wednesdays page.

Visit Wok Wednesdays on Facebook!

Tuesday, January 22, 2013

TWD: French Apple Tart

Tuesdays with Dorie baking through Baking with Julia
by Dorie Greenspan
Contributing Baker: Leslie Mackie


This is a stunning dessert that is easier than it looks to achieve - you just need to allocate a full day to make it or you can get a head start by making the tart dough up to five days ahead, and I don't see any reason why you could not make the filling the day before - cover and refrigerate it. I would bring the filling to room temperature before placing it in the crust.

The filling is a simple compote (aka applesauce) made of apples, sugar, cinnamon, lemon juice, and to thicken the compote, a bit of flour and breadcrumbs. Yes, you read that right - breadcrumbs. I never before have used breadcrumbs as a thickening agent. We learn something new everyday.

I was going to skip the addition of the crumbs, for the recipe calls for "fresh fluffy bread crumbs" which I interpret to be made from white bread, and all I have is whole-grain seeded bread and was not about to buy a whole loaf of white for one slice.  I then heard that the crumbs help soak up the juice of the baked apples and decided to go ahead with using my whole-grain bread (don't want a soupy tart now) after reading another baker from our group used her homemade half-white/half-wheat bread and it turned out fine, as did mine.

Should I make this again I would brush the finished tart with some apricot glaze to give it a little shine. The apple design has a dehydrated, unrefined look to it which I think is why I keep calling it a rustic apple tart instead of French apple tart. 

Leslie (the contributing baker) states, "This tart is at its prime ever so slightly warm or at room temperature."  I find this true with just about any baked good. I enjoyed my slice at room temperature and it was good. I was going to send the rest into work but forgot to tell the hubby to take it, and then I forgot to take it in with me. Darn. Now I have to eat it.

The following day I had myself another slice (or was it two?) and had a few bites cold and then the remainder went into the microwave for about ten seconds just to warm it ever so slightly. Personally - I think it tastes better the following day and the next.

I have about a third of the pie left so I thought I would toss it into the freezer and see what happens. Wouldn't it be fabulous if this could be made ahead and frozen! You can buy completed pies and cakes in the freezer section of the grocery store, so why would it not work at home?

Success meter (1-3): 3

(Edit: I forgot to mention that after baking for the alloted time the tart was not browning, so I placed it under the broiler till the edges of the apples were nicely colored.)


Note: My apologies for the poor quality of some of the photos. By the time the tart was baked it was getting dark. Some shots where taken in the kitchen and others in the back room; hence the color differences.


Fold your dough into quarters (fold in half, then in half again) for easy transfer to your tart pan or pie plate.


You don't have to buy pie weights - you can use beans or rice.


A melon baller makes coring apples a snap.

The filling consists of apples, sugar, flour, cinnamon, bread crumbs and lemon juice.


Mash the apples to your desired consistency.

I floated the apples for the topping in lemon water as I sliced them to keep them from turning brown.
Pat dry before slicing.


This is a great recipe to pull that mandoline out of storage.

After filling the tart shell arrange your apple slices in a circle atop the purée.


To form a rosette you need to cut your apple slices paper thin in order for them to bend slightly.

Brush the finished tart with melted butter and sprinkle with sugar.


At the last minute I thought a sprinkle of cinnamon would be pretty...


Should you want to make this fun and tasty recipe, you will find the original recipe on the blog of our host of the week: Gaye of Laws of the Kitchen or you can purchase the book Baking with Julia, there you will find the recipe on page 379.

Do make sure and check out my fellow baker's take on this recipe. There are always interesting variations from ingredients to finishing techniques.