Showing posts with label potatoes. Show all posts

Wednesday, February 25, 2015

Wok Wednesdays | Stir-Fried Aromatic Potatoes

WW wokking through Stir-Frying to the Sky's Edge
by Grace Young


These may look like French fries, but they are way better, and better for you!

 Mise en place.

Bowl 1: Garlic, ginger
Bowl 2: Potatoes
Bowl 3: Scallions
Bowl 4: Rice vinegar
Bowl 5: Salt, white pepper


The unexpected garnish! As I was shredding my scallions, this piece rolled away from me and curled up so beautifully. Couldn't have done better if I tried. ;)

These tasty morsels are made from new potatoes, rather than russets, which give them a soft, buttery like texture. They are stir-fried along with minced garlic and ginger until the potatoes are just crisp-tender, then the scallions and rice vinegar are added at the end, with a sprinkling of salt and pepper, and given a quick toss to mix everything together.


It's amazing that, that little splash of vinegar lends so much flavor to the potatoes. I really think it is the key indredient to this dish.


I was on the fence about cooking these just a little longer, for they were just shy of being al dente. But I did not want to overcook them either, for Grace mentions that they can turn mushy and fall apart if you do. So I erred on the side of caution, and left them with a bit more bite than I'm sure they were supposed to have.

Aside from just being a tad undercooked - these were delicious, and would make a wonderful side-dish to any meal.


We have been asked not to post the recipes here on our blog. If you would like the recipe, you will find it on page 210, of  Stir-Frying to the Sky's Edge (and just so happens to be available on Google books), which you can purchase at your local bookstore or find it at your local library. I highly recommend purchasing the book - you won't be disappointed.  

Wok Wednesdays is an online cooking group. If you would like information about joining us, click here, or visit us on Facebook. Would love for you to wok along with us!


Thursday, November 27, 2014

The Cottage Cooking Club | November Recipes

The CCC cooking their way through Veg Everyday
by Hugh Fearnley-Whittingstall


My selections for November:

Rutabaga "Farrotto"
Twice-Baked Potatoes
Chestnut and Sage Soup
Crostini
Patatas Bravas

Click here for the complete list of August's recipe options.


Rutabaga "Farrotto"


The actual recipe is named Rutabaga (or Swede - depending on if you have the US or UK version of the book) "Speltotto". It's a play on risotto, a rice dish - here Hugh substitutes spelt for the rice.

I could not find pearled spelt, so I opted for pearled farro. It is mentioned in the book that pearled barley could be substituted, but reading the packages, barley can take up to an hour to cook, as where the farro only takes about twenty minutes - this is why I chose the farro over the barley, and I was happy with the outcome.


Cubed rutabaga is mixed in with some sautéed onions and garlic. The farro (or spelt), is stirred in until it is covered in oil and butter from the onion mixture. As with risotto, warmed broth is added in next, about a cup at a time, and stirring until the grains have absorbed all the liquid, before adding the next cup of broth. After all the broth has been added and the grains and rutabaga are tender (al a dente), some parsley and cheese are mixed in along with some salt, pepper, and nutmeg. 

The Mr. deemed this "good & hearty".  He took the leftovers to work for him and a co-worker; who commented "this must be healthy. It's on the bland side." Just goes to show you, how individual tastes vary.


Twice-Baked Potatoes


Who doesn't love a good baked potato? Twice-baked or otherwise. 


For me, baked potatoes are an easy and quick comfort food. Twice-baked are a bit more indulgent and take a little longer - but not much, and are worth it. Served with a salad, you have an easy weeknight meal.

For twice-baked potatoes, you cut the top off of a baked potato and scoop out the flesh, mix it with some butter and sour cream (or Greek yogurt as I did), and add in your favorite fixings - this can be anything from bacon to broccoli - use your imagination. Replace the filling into the shell, mounding it, and bake again until heated through. 

For this recipe, scallions, smoked Gouda, and a generous dash of cayenne pepper where my choice of fixings. This would also be delicious with sautéed mushrooms added in, as I did with these potatoes in a previous post.

Add extra cheese and scallions (or chives) for garnish, just before serving. I added extra cheese on top, gave it another minute or two in the oven - just long enough for it to melt, then I added sliced scallions and some Gouda hearts.


Chestnut and Sage Soup


A lovely chestnut soup topped with crisp fried sage leaves, chopped chestnuts, and a spattering of yogurt.


The recipe states you can use vacuum-packed precooked chestnuts. I wanted to try my hand at roasting my own - though it is mentioned in the book to blanch, peel and simmer the chestnuts. But we all know roasting brings out a much deeper flavor in foods than boiling ever would.


Chestnuts roasting on an open fire..♪

Well not quite... these were roasted in the oven... and an electric oven at that. 

Before the chestnuts are roasted, they are first soaked in warm water for about half an hour. Then the flat side of the chestnut is scored with an X (the skins are tough - you will need a very sharp knife). They are then placed on a baking sheet, flat side up, and roasted until the skins curl back at the X, and the chestnuts are tender.


They are peeled while still warm for easier peeling- so it's said. It's a tedious job to say the least. It was not till I was just about done, that I found that if I squashed the chestnut with the palm of my hand, it helped release the skin from the meat.

I ended up having to make only half the recipe, for after the chestnuts were cooked and peeled, my pound of chestnuts yielded only seven and a quarter ounces of chestnut meat! The recipe calls for fourteen ounces.
 

Roasting and peeling the chestnuts was the hardest part - using precooked chestnuts, this soup will come together fairly quickly.

Onions are sautéed in a bit of olive oil and butter until soft, then some sage and garlic are added and cooked for another minute. Even though I halved the recipe, I used the full amount of sage called for in the recipe, and doubled the amount of garlic (the recipes in this book seem to need an extra boost when it comes to the herbs and spices).

Vegetable broth is added to the onion mixture, along with most of the chestnuts (a few are reserved for garnish), salt and pepper, and is simmered for about fifteen more minutes. The soup is cooled slightly, then transferred to a blender or food processor, and puréed. I prefer to use an immersion blender, for transferring hot liquids back and forth, to me, is an accident waiting to happen - and makes for less clean up! Crème fraîche is added to the purée with any needed additional seasonings. I liked the soup the way it was, so I omitted adding the crème fraîche.

The soup is garnished with fried sage leaves and sliced chestnuts. The recipe states to finish it off with a drizzle of olive oil. I used some non-fat Greek yogurt thinned with milk; though the drizzle of oil makes for a very pretty presentation.

I would make this one again - only using the packaged precooked chestnuts next time.


Crostini


Crostini. It's just a fancy name for toast that is topped with your choice of deliciousness.


I make these often to go with a roasted butternut squash soup that I make. The recipe in the book has you drizzle olive oil over the bread, sprinkle with some salt, then bake until golden. Hugh lists in the book several toppings to choose from.

My version, I butter the bread and toast until golden (I did do one as Hugh suggests - the center one, with olive oil and a sprinkling of salt).


After toasting the bread, my version is turned over (Hugh's is removed from the oven and is spread with the topping of your choice), and is then topped with cheese, thyme, sage, salt and pepper. They are popped back in the oven just until the cheese is melted. I normally make these with Gruyère cheese. However, this evening I used white cheddar, for this is what I had on hand; either way, they are delicious.


Hugh suggests to top only one half of the crostini, leaving the plain half as a palate cleanser. I can't say how Hugh's version compares to mine, for my husband woofed it down - probably did not even notice that only half the bread was topped with the cheesy goodness. I'm confident that it was just as tasty.


Toasted bread and cheese. Need I say more?


Patatas Bravas


Wow. Incredible flavor. The Mr. even gave it an A+.


The book states that this is a classic Spanish tapa. We didn't go the appetizer route with this, we served it alongside our baked chicken and steamed broccoli; and the leftovers were great with our pouched eggs the next morning.

This dish consists of a homemade spicy tomato sauce (delish!) and fried potatoes.

The sauce is made from sautéing some onions, thyme, garlic and a hot chile pepper. Then a can of tomatoes, some paprika, sugar, salt and pepper are simmered together until you have a nice, rich, thick looking sauce. This is kept warm, while you make the potatoes.

Boiled (slightly undercooked) cubed potatoes are sautéed in oil until they are golden and crispy, and given a sprinkling of salt.

The potatoes are then placed in a serving dish and topped with the (out of this my world) spicy tomato sauce, and garnished with some parsley (or in my case, thyme).

This was the favorite of the month.


To see what recipes the other members chose for this month, head over to the November LYL post on the CCC website, by clicking here.

We have been asked not to publish the recipes here on our blogs. We encourage you to go out and purchase the book and join us on this fun and healthy adventure!


Sunday, March 2, 2014

The Accidental Post: Twice-Baked Potato

Recipe courtesy of Fine Cooking Magazine


These twice-baked potatoes puts all others to shame.

As I have mentioned in previous posts, Fine Cooking is my all-time favorite magazine. Their recipes are no-nonsense, uncomplicated, and always delicious. This months (April/May 2014) issue is no exception.

There are days when I don't feel I have the energy or desire to make an overly involved recipe, or even go out to dinner. On these days, I'll make a baked potato and a salad, and call it a day. Normally, I will just give it a sprinkle of s&p, maybe add some Greek yogurt. Boy, have I been missing out.

Twice-baked potatoes are a bit more involved than your throw-in-the-oven baked potato, but so worth it. I took the main recipe of Potatoes with Cheddar and Chives, and added the sautéed mushrooms from a variation suggestion. A very good call on my part if I do say so myself; the flavor was out of this world - the mushrooms added an earthy, almost meaty flavor, the cheese lending a creamy tartness to the flaky flesh, with a hint of onion from the scallions sprinkled on top. Bliss. Pure bliss.

The potatoes were so beautiful coming out of the oven (my apologies for the poor lighting), I thought I should take a picture, you know, just in case they tasted as good as they looked - and they did, even more so.

These were quite filling to say the least. I mentioned to my husband, that we could easily share one - save half for our breakfast in the morning; I thought it would taste great, topped with a poached egg. He promptly said, uh no - I'm going to eat the whole thing - and he did - and so did I.

My husband also mentioned that I'll have to make these again, maybe for his lunch one day. He even joked about putting in a real oven down at the shop. Hmm.. not a bad idea, actually. 


As I inhaled this heavenly meal, my mind was running overtime on how else I could present this deliciousness. I'm thinking potato pancakes - served with a red pepper sauce, or add the same flavors to your holiday mashed potatoes, or.. leave well enough alone.

These were fabulous... you gotta make em. 

Monday, May 27, 2013

TWD: Savory Brioche Pockets

Tuesdays with Dorie baking through Baking with Julia
by Dorie Greenspan 
Contributing Baker: Nancy Silverton 


I was excited to make these, for all the components sounded delicious. Goat cheese is my all-time favorite, and I love caramelized onions; and who doesn't like mashed potatoes!

This was my first experience with making brioche. It really is a wonderful dough to work with. You do however need a heavy-duty mixer to make this type of dough. I have read that this dough has pushed the limits of some mixers - may even have sent one to mixer heaven.

This same dough recipe was used for making the sticky buns made by the group last year at this time; the one recipe I passed on. I still have half the brioche dough in the freezer - maybe I'll attempt them after all.

Unfortunately these were just OK. Not anything like I had inticipated. The flavor quotient needs to be anted up a bit. I'm thinking roasted or grilled asparagus would have been more flavorful and the potatoes were rather bland as well. I wish I had gone with my initial idea of replacing the chives with a mixture of sage and thyme. The spuds also were very dry, to which I added a half cup of non-fat yogurt. I was surprised the recipe does not call for adding salt and pepper to the onion mixture; I did, and it made a big difference in taste - however, it did not help the overall product in the end.

I loved the look of these - they do make for a beautiful presentation. With some flavor enhancement and made smaller, they would make a great appetizer for a party.

Success meter (1-3): 1.5

The sponge. This consists of whole milk (I used half and half - I forgot to buy milk), yeast, egg, and flour. Mix together and sprinkle more flour on top and let rest for 30 to 40 minutes, at which time the flour cracks - the indication that your yeast is alive and well and ready to proceed.

Add to the sponge - sugar, salt, eggs, and flour. This gets mixed for fifteen minutes till the dough comes together and you hear a distinctive slapping sound (I barely heard it) from the dough hitting the side of the bowl. You now have a beautiful soft ball of dough.

Next step is to add the butter which needs to be similar in consistency of the dough. Smear your butter on a cool surface with a pastry cutter or bash it with a rolling pin. Do not handle the butter with your hands or mix it too much. You want it to remain cool - not warm or greasy.  This you add to the dough and mix. Your beautiful ball of dough breaks apart at this time. Do not fret! The dough miraculously comes back together into another soft and supple ball.

Place the dough in an oiled bowl to rise for two to two and a half hours, until doubled in bulk.

After the first rise, deflate the dough by running your hand underneath the perimeter and giving it a little fluff with your hand. Cover and chill overnight.

Prepare your filling by sautéing your onions, boiling your potatoes, and asparagus. I highly recommend roasting or grilling the asparagus for more flavor.

On the advice of another baker, I cut my circles in two different sizes to save time of having to stretch the second circle larger after cutting to accommodate the mound of filling.


 If only they tasted as good as they looked.

As you can see, only the tips of the asparagus are used here. To use up those tipless spears, grill them and use them in Grilled Asparagus and Portabella Mushroom Salad. (Portabella/Portobello. Tomato/Tomahto. Depending who you talk to or read, it's one or the other. Me, I prefer the spelling with o's.) A photo of this salad appears below.
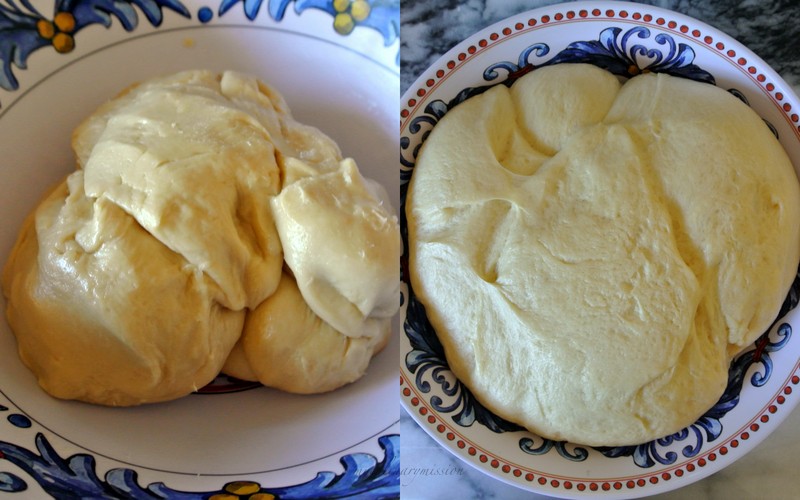
 Oh so very pretty; too bad they don't hold their shape after baking. 
Once all your pockets are formed, give them an egg wash and let rise for twenty minutes.

 The sage leaves I purchased were enormous in size! I folded them in half and gave them a little trim.

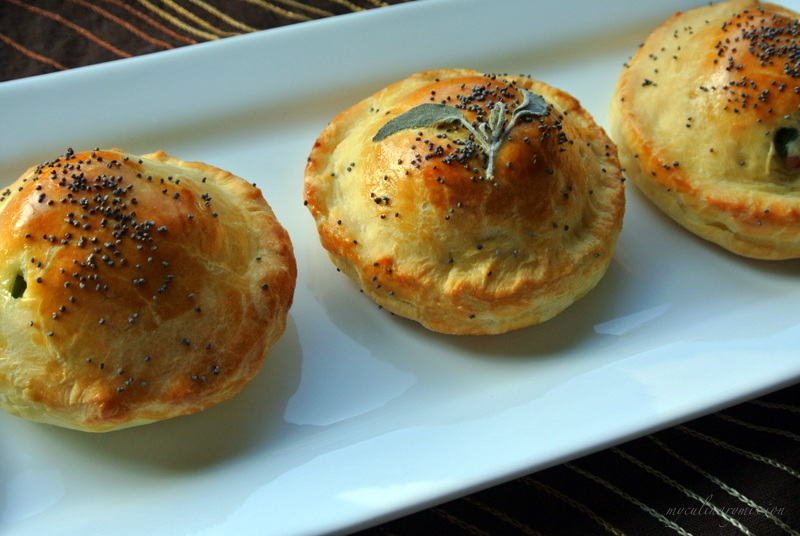
After the twenty minute rise, they should be slightly puffy and spongy. Give them a second coating of egg wash and top with poppy seeds and sage leaves.

 Bake until beautifully golden brown.


 Here we have a beautiful (though bland) brioche pocket served alongside the delicious salad mentioned above.

Carrie at Loaves and Stitches is our host for the week, you can find the recipe on her blog. And don't forget to check out the results and other variations of this recipe from all the talented bakers we have in the group. You can find their links on the Tuesdays with Dorie website under the link titled LYL: Savory Brioche Pockets

I would like to share a couple of tips with you.:

To keep the dough cool while rolling out and not having to move the dough back and forth from the fridge from it becoming too soft and warm while handling, I placed an ice pack under my marble board. Works like a charm.

I also placed an ice pack between two cookie sheets while forming the pockets. This may have hampered the second rise a bit; I did not feel they rose all that much more, however, it seems no harm was done.

A fabulous tip I learned from my friend Christine, use the butter wrapper to grease your cookie sheets (or bowl in this case). Usually there is just enough butter left on the wrapper if you have let the butter set out to come to room temperature.