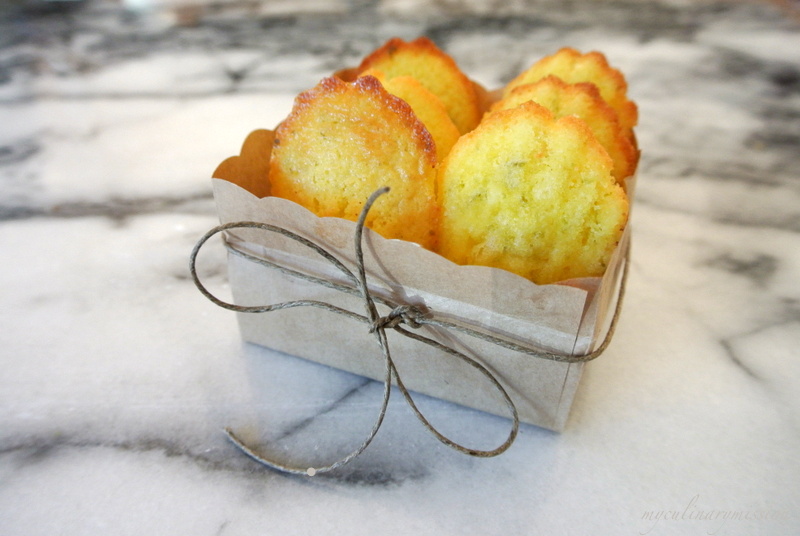
Thursday, May 2, 2013

Beautiful Baby Beet Salad

From the book Celebrate! by Sheila Lukins


I recently posted a recipe for a beet salad, and as I mentioned in that post we love beets in our household, hence another beet salad recipe so soon, yet very different from the last.

Normally I like to use a mixture of red and golden beets; however, on a beautiful sunny day at the farmer's market the golden beets stood out and screamed summer to me, where the red ones made me think of winter, so golden beets only this time around. And to be fair, I used only red beets in the last salad. 


To prep your beets for roasting, trim the greens to about an inch long. The directions have you trim the root end as well, which I have never done in the past. I would not bother with trimming the root, it leaves the firm end of the root exposed and it pokes through the foil; and you don't want beet juice dripping all over the bottom of your oven.

After roasting, let the beets cool enough to handle and then simply slip the skins off.


In addition to the beets being tossed in a vinaigrette, this salad is served with an orange-mint dressing to serve on the side for dolloping on top.

Whenever a recipe calls for mayonnaise, I always use half mayo and half non-fat plain Greek yogurt. Fage brand is my favorite.


The dressing is made up of mayo, mint, orange zest and juice, salt and pepper. At first bite I liked the dressing with the beets, but the orange zest had a bitter aftertaste that I did not care for. My husband said he too preferred the beets without the dressing - it was too overpowering - you could not taste the beets themselves.

If not for the bitterness of the zest, this would have made a great appetizer.

Success meter (1-3): 2

Wednesday, May 1, 2013

WW: Velvet Chicken and Asparagus

Wok Wednesdays wokking through Stir-Frying to the Sky's Edge
by Grace Young


This recipe takes a little bit of advance planning before you can start the actual stir-frying; the asparagus needs to be blanched and the chicken marinated (not for adding flavor, but to create tenderness) thirty minutes prior to cooking - a process called velveting.

If like me, you fail to read the recipe beforehand, you can still get this on the table in a reasonable amount of time - oh the joys of stir-frying!

Chicken breast can and usually turn out dry, no matter how you cook it - until now. To velvet chicken (or other meats/fish) you combine it with some egg white, cornstarch, rice wine, salt and oil. Chill for thirty minutes then give it a quick blanching in some water that oil has been added to. The result after stir-frying is amazing; tender, soft and silky smooth.

I only wish I could use this technique with chicken that I plan on barbecuing. It is not advised to "brown" the meat you have velveted - I'm not real clear as to why not. It has something to do with overcooking the velveting ingredients themselves.

Once again, we have another successful recipe from the book Stir-Frying to the Sky's Edge (a must have!).

Success meter (1-3): 3


 The chicken in the "marinade".

Asparagus is blanched and dried. With stir-frying you want to make sure your ingredients are dry as possible to avoid hot oil splatters and the braising of your dish. I find using a salad spinner works well at getting the water off of the vegetables.

 You can almost see the silky smoothness the chicken has obtained after marinating.

Trust me - you'll get past the eating of "white" (not browned) chicken with the first bite. The velveted chicken is sublime.

A career in food styling is not in my future...

One of the rules of the Wok Wednesdays group is we are asked not to post the recipes here on our blog. If you would like the recipe, you will find it on page 128 in Stir-Frying to the Sky's Edge, which you can purchase at your local bookstore or find at your local library. I highly recommend purchasing the book - you won't be disappointed. 

Wok Wednesdays is an online cooking group. If you would like to join us or just want more information, click here or visit us on Facebook.


Monday, April 29, 2013

Book Ninety-Eight: Celebrate!

by Sheila Lukins


Everywhere you turn, there seems to be some new version of a "chip". There is the old faithful potato chip, sweet potato chips, kale chips, banana chips, and this one (so I believed), the tomato chip.

I would not go as far as to call these chips. The only resemblance is maybe their shape and size - but I'm sure the term is used lightly, as with kale chips - at least they are crisp. 

I would have never thought to try and make a "chip" from tomatoes due to their high water content - and I was right. The book does states that these do not get crispy like a chip, but they have a "snap" and a chewy texture.

Out of the five tomatoes, only four slices could be considered chewy and with a "snap", and looked to be disintegrated; to be fair, they were the ones with the best flavor.

I do love anything roasted, and when these tomato "chips" were placed on a rosemary cracker, spread with some delicious goat cheese (as suggested in the book), they were pretty darn tasty.

So forget about the crisp, crackly, crunchy texture of a true chip, and enjoy these for what they are: simply roasted tomatoes.

Success meter (1-3): 2 (I rated this a two based on the "chip" factor - otherwise they did have great flavor and makes for a wonderful appetizer.)


The tomato slices drizzled with olive oil and dusted with sugar and pepper. Next time, I'll omit the sugar and sprinkle them with salt.


 This is one of the best "disintegrated" tomato slices..


I was able to scrape the disintegrated tomatoes off the pan, and I have to say they had the best flavor. Think - sun-dried tomatoes.


Thursday, April 25, 2013

Book Ninety-Seven: Michael Chiarello's Casual Cooking

by Michael Chiarello

Named after the famous restaurant Da Delfina in Italy.


I was browsing through my cookbooks looking for something to make for dinner (main course) when I came upon this recipe.

I was on a hunt for something in the healthy spectrum, and normally I cringe shy away from any recipe that is deep fried. However, I could not resist the photo in the book, and I justified making these being we had Raw Kale Coleslaw for dinner on Monday, and Grilled Portobello Burgers (normally made with pesto mayo and provolone - this evening I used pesto only and subbed goat cheese) on Tuesday. I figured we could splurge today, this a side dish after-all, along with tonight's dinner of grilled chicken and an arugula strawberry salad.

Mr. Chiarello says to serve these with a simple roasted meat, and they will steal the show; and that they did. 

Success meter (1-3):


 Pick out the smallest Yukon Gold potatoes you can find.


 It took about eight medium sized garlic cloves to attain one-quarter cup chopped garlic.

The instructions say to remove the garlic from the oil with a slotted spoon - this will not work with chopped garlic. I poured the garlic from the pan into a sieve placed over a bowl.

 Mix the sautĂ©ed garlic into the parsley and lemon mixture.

 I chose to use a glass to smash the potatoes rather than using my hands as instructed.

 You want to smash the potatoes just till the skins split.

Pour half-inch of peanut oil into a fry pan and cook on both sides till crispy - darker the better. I did not have peanut oil and subbed grapeseed and walnut oil, and only poured about a quarter inch. I may try making these again with just coating the pan with oil instead of deep frying - then again maybe not; why mess with a good thing.

 Remove potatoes from oil and drain on paper towels. Season with salt and pepper.

The recipe states to toss the potatoes in the parsley-lemon mixture. I felt the potatoes were to fragile to be tossed so instead I sprinkled the "gremolata" on top, which you will want to be generous with it's so good.

 These are heavenly - the potatoes are crispy on the outside and creamy on the inside.


Tuesday, April 16, 2013

TWD: Madeleines

Tuesdays with Dorie baking through Baking with Julia
Contributing Baker: Flo Braker


This week's Tuesdays with Dorie recipe is Madeleines - probably didn't know that did you?

The cookbook mentions that this type of tea cake (or cookie, your choice) is the same that "caused Proust to remember things past". Who the hell is Proust? I had to google the name - and if you google madeleine, several entries mention the two together. I even texted my sister who is an avid reader to ask if she had read any of his work, and if I should know who he is. No she had not, and yes I should, for he is famous.

Well, after researching him on-line, I have to say I don't feel I'm missing much and therefore will not be reading any of his works anytime soon, if ever. (No offense to those who enjoy Proust.)

These little tea cakes are made with a Génoise batter, very much like the Strawberry Cake we made last year. Personally I found the strawberry cake quite boring in taste, though stunning to look at; so to amp up the flavor I added the juice and zest of a couple of lemons and a few limes.

The recipe calls for two whole eggs and four egg yolks. I was short an egg so I only used three yolks. The finished product had a nice citrus flavor, but the texture was too spongy, almost to the point of rubbery. I would have preferred a more cake-like texture. 

Reading the P&Q (pointers & questions) section on the TWD site, a few bakers mentioned their cakes were drier than other madeleine recipes they have tried. I have to say, my little cakes were moist and stayed moist a couple of days later. I'm sure the addition of the juice helped with that, and I'm not sure, but maybe one less egg helped as well?

The lemon and lime lended a bright taste to these little cakes, so I may try my hand at madeleines again, but with a different recipe. Until then, if I need a citrus fix, I'll make these delicious gems made with grapefruit and lime.

Success meter (1-3): 2


Homemade vanilla. A gift from my lovely daughter.


I added about one-half tablespoon lemon zest and one whole tablespoon lime zest. I would have used equal amounts, but I only had two lemons. I also used one tablespoon each of the juice.

As suggested by a few fellow bakers, I used only butter to coat the pan; giving it two coats of butter - chilling between coats.


Perfect looking little cakes! Don't they look like they'll just slip right out of the pan? Not the case - had to pry these puppies out. Not too much damage though.


The second batch I decided to experiment a bit. Instead of butter (too lazy to melt more) I coated the tin with olive oil and to half the pan I dusted with flour (as suggested in the recipe) and the other half I dusted with sugar; I also baked them a bit longer - hence the darker edges - hoping this would help them release from the pan easier. Nope. Still had to be pried. Maybe a non-stick pan would alleviate my sticking issue.

If I do get around to making these again, I would use the butter and flour process, for the cakes turned out the best as appearances go - and bake them less so they are not quite so dark. Using the sugar actually gave the cakes a nice little crunch which I enjoyed, but I would like to have the more noticeable ridges that were achieved with the flour method.

The cookies did not quite develop the prominent hump that madeleines are known for. Some recipes call for a teaspoon of baking powder where others such as this do not. I think the addition of baking powder would have helped with obtaining the signature hump.


Because it's fun to play with your food! (A future post.)


You can find the madeleine recipe on pages 41 and 334 of Baking with Julia, or at our host's site, Counter Dog. To see other wonderful creations of these tea cakes, check out the talented bakers of our virtual cooking group - you can find their links on the LYL: Madeleines link over on the TWD site.